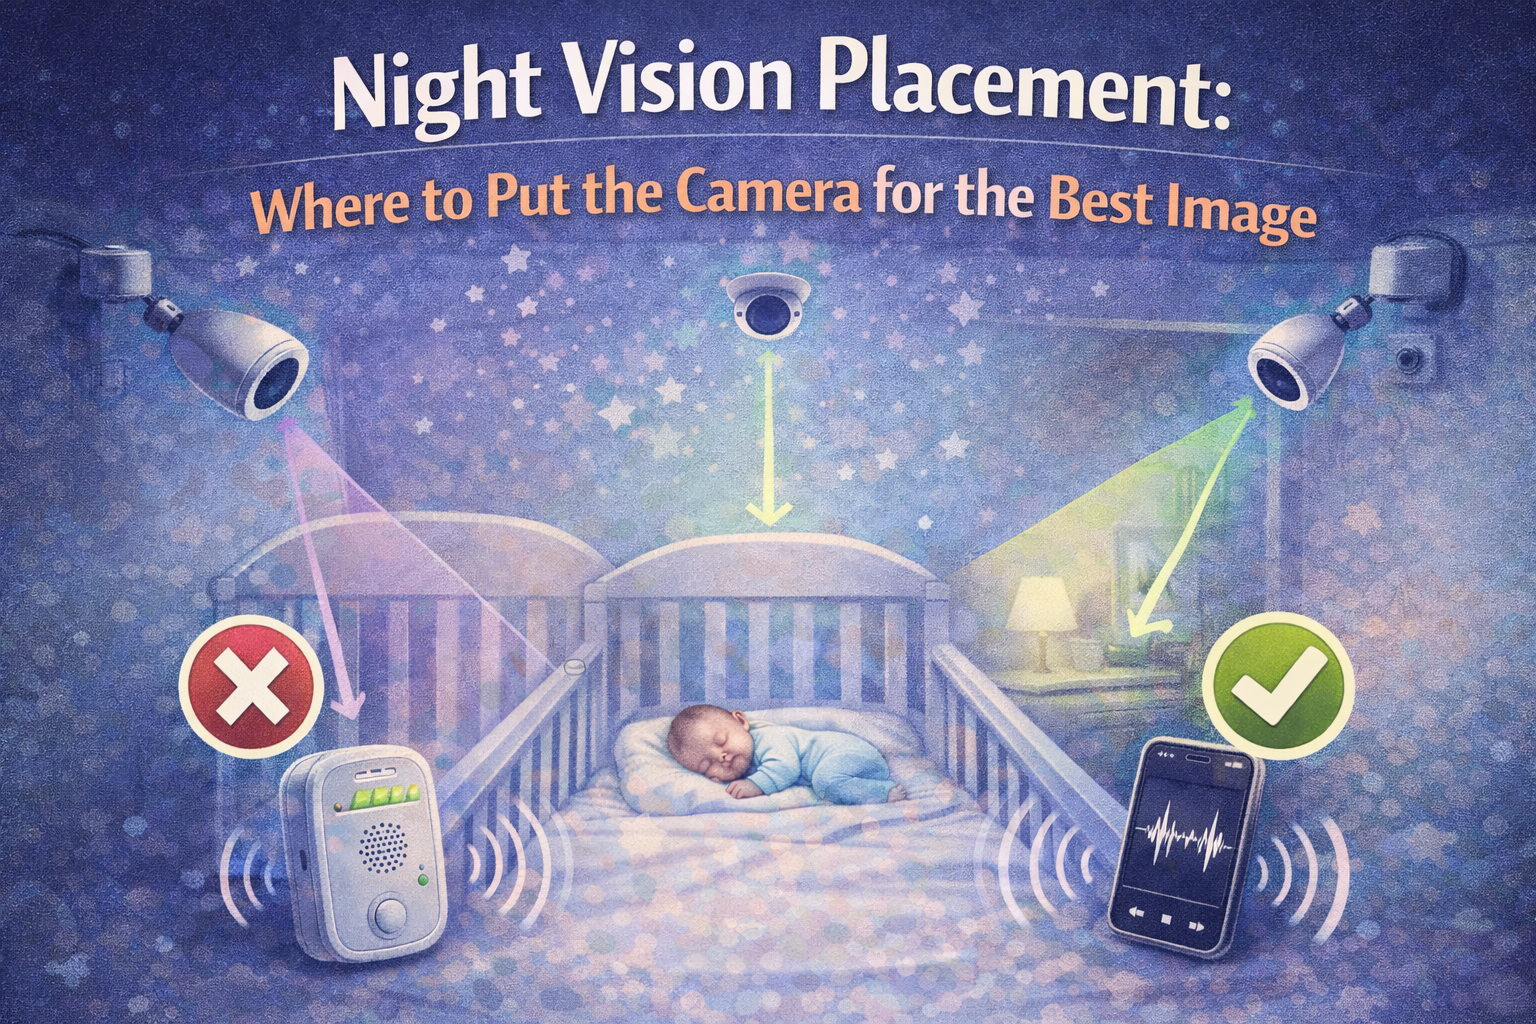
Night Vision Placement: Where to Put the Camera for the Best Image
Night vision placement for baby monitor cameras is one of the most overlooked parts of setting up a nursery. Many parents assume that if the monitor has night vision, it will work well no matter where they put it. In reality, placement makes the difference between a clear, useful image and a grainy, washed-out blur.
Let’s go through how night vision actually reacts to distance, angle, and room layout-and how to place your camera so it works the way it’s supposed to.
Why Placement Matters So Much for Night Vision
Night vision works by emitting infrared light and then capturing the reflection of that light.
That means:
- The camera does not “see in the dark” the way your eyes do
- It depends entirely on how that infrared light bounces around the room
If the camera is:
- Too close, the image can become overexposed and foggy
- Too far, the image can become dark and noisy
Good placement is about giving the camera the right amount of space and the right angle.
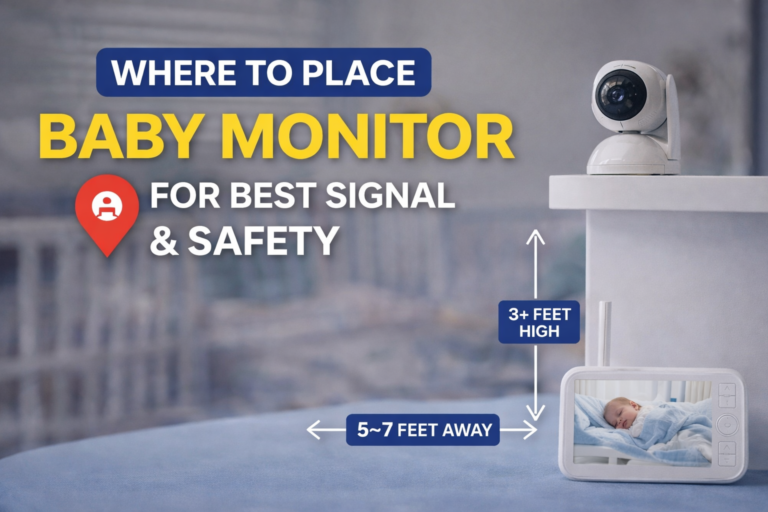
The Ideal Distance From the Crib
For most baby monitors, the sweet spot is:
About 1.5 to 2.5 meters (5 to 8 feet) from the crib.
At this distance:
- The infrared light spreads evenly
- The baby is not overexposed
- You get a clear view of the whole sleeping area
If the camera is much closer than that:
- The baby may look like a bright white shape
- Details disappear
- The image can look foggy or washed out
If it’s much farther:
- The image often becomes darker and noisier
The Best Height and Angle
The most reliable setup is:
- Camera mounted:
- High on the wall
- Or high on a shelf
- Angled:
- Down toward the crib
This gives you:
- A full view of the sleeping area
- Better depth perception
- Fewer shadows and reflections
It also:
- Keeps the camera and cables safely out of reach
Why Placing the Camera at Crib Level Is a Bad Idea
Putting the camera:
- On the crib rail
- Or on a low table next to the crib
Causes several problems:
- Safety risk (falling or cables)
- Much worse night vision
- More glare and overexposure
- A very narrow field of view
Even if it looks okay during the day, it usually performs much worse at night.
Wall Mount vs Shelf: Which Is Better?
Both can work, but:
- Wall mount:
- Is more stable
- Gives the most consistent angle
- Is safer in the long term
- Shelf or furniture:
- Is fine as a temporary solution
- Needs to be very stable
- Should not be easy to bump or move
For night vision quality, stability matters.
Even small shifts in angle can change how infrared light reflects in the room.
How Room Surfaces Affect Night Vision
Night vision is very sensitive to reflections.
Things that often cause problems:
- Very light or glossy walls
- Mirrors
- Shiny furniture
- White crib rails very close to the camera
These surfaces can:
- Reflect too much infrared light
- Create bright spots or haze in the image
If your image looks foggy or washed out:
Try slightly changing the angle or moving the camera a bit farther away.
Sometimes even 20–30 cm makes a visible difference.
Should You Use a Night Light?
In most cases, no.
A night light:
- Can confuse the camera’s night mode
- Can create:
- Glare
- Strange shadows
- Uneven exposure
Modern baby monitors are designed to work in complete darkness.
You usually get the best image when the room is truly dark.
What About Wide-Angle Lenses?
Many monitors now have wide-angle lenses.
This is helpful because:
- You can place the camera a bit farther away
- Still see the whole crib area
But:
- The same placement rules still apply
- Too close is still too close, even with a wide-angle lens
A Simple Step-by-Step Setup Method
Here’s a practical way to get it right:
- Place the camera high, angled down
- Start at about 2 meters (6–7 feet) from the crib
- Turn off the lights and check the night image
- If it looks:
- Washed out → move it slightly farther away or adjust the angle
- Too dark → move it slightly closer or adjust the angle
- Repeat until the image looks clear and balanced
This takes five minutes and makes a huge difference.
Common Placement Mistakes
- Putting the camera too close to the crib
- Aiming it straight across the room instead of downward
- Pointing it at reflective surfaces
- Using unstable furniture that gets bumped
- Ignoring night performance because daytime looks fine
Always judge placement based on how it looks at night, not during the day.
Safety Still Comes First
No matter how good the image looks:
- Keep:
- The camera
- And all cables
Well out of the baby’s reach.
Good placement should:
- Improve image quality
- And maintain a safe sleeping environment
How This Ties Into Your Monitor Choice
Some monitors:
- Handle difficult rooms better than others
- Have:
- Stronger infrared lights
- Better sensors
But even the best monitor:
Will look bad if it’s placed badly.
If you’re still choosing a system and care about reliability and simplicity, you can also see our guide here:
Best Baby Monitor Without WiFi
So, Where Should You Put the Camera?
In most rooms, the best answer is:
- High on the wall or shelf
- About 1.5–2.5 meters from the crib
- Angled down
- Not pointing at shiny or very light surfaces
That setup works well in the vast majority of homes.
Final Thoughts
Night vision quality is not just about the camera. It’s about how you use it.
A few minutes spent adjusting placement can:
- Turn a frustrating image into a clear one
- Reduce guessing
- And make night checks much easier
It’s one of the simplest improvements you can make.
What is the best night vision placement for a baby monitor?
Usually high on the wall or shelf, about 1.5–2.5 meters from the crib, angled downward.
Why does my baby monitor look foggy at night?
The camera is often too close or pointing at reflective surfaces, causing infrared light to bounce back into the lens.
Should I use a night light with a baby monitor?
Usually no. Most monitors work best in complete darkness.
Can moving the camera a little really make a difference?
Yes. Even small changes in distance or angle can significantly improve night image quality.